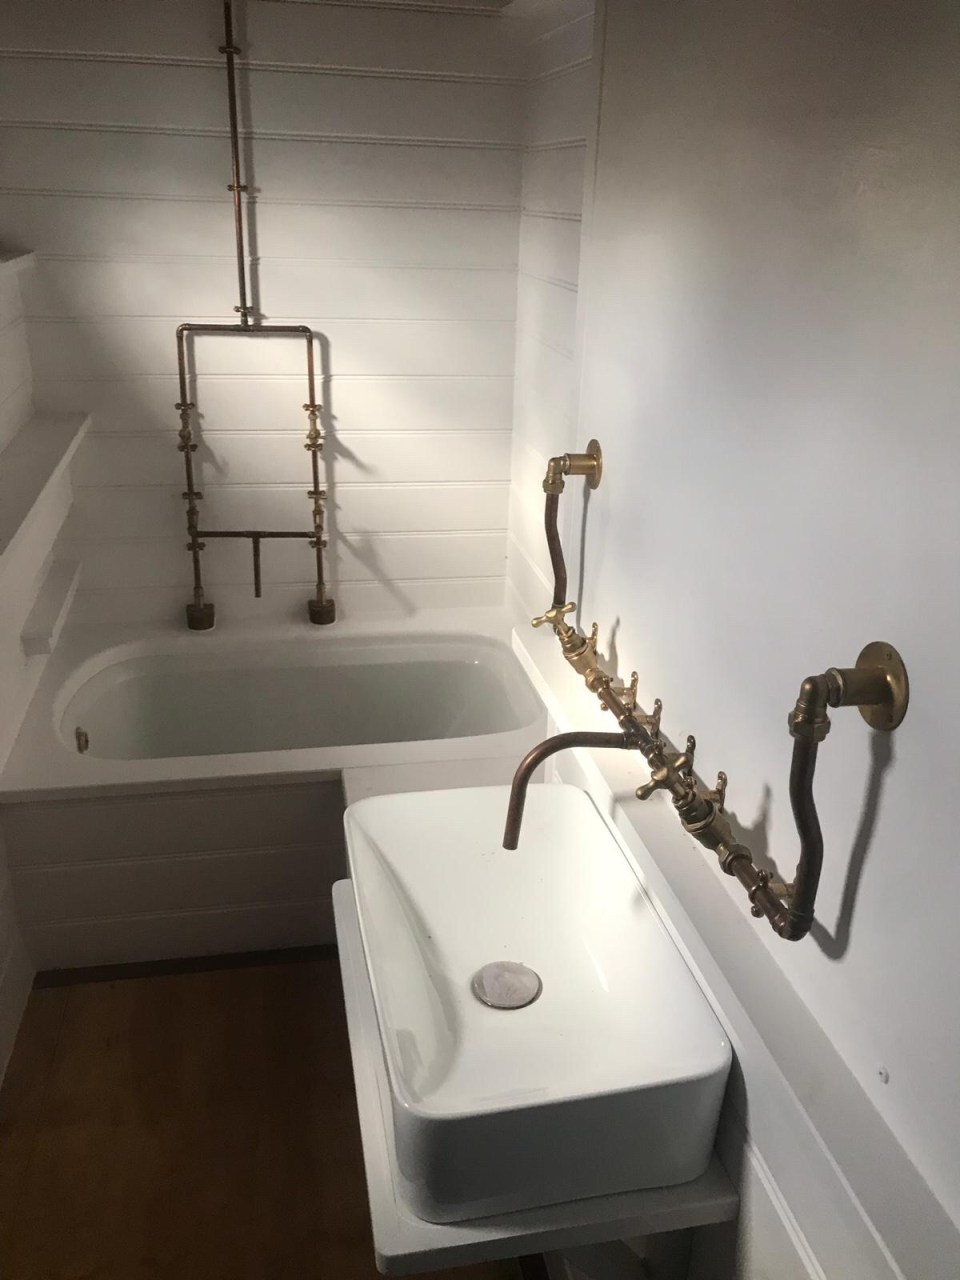
Author Archives: hellyboo

Stuck in a hole

Having inherited a very corroded rated old boat, I need to do everything possible to ensure it stays as rust free as possible. This involves sorting out the chain locker so the anchor chain no longer sits directly on the hull but instead is supported by a wooden platform. Only problem is constructing the wooden platform in a space the size of a telephone box that you have to lower yourself into through a hole you can’t get your shoulders through…

Tom is loving this job!

Advertisement

Progress

Things are cracking on a pace. Really moving full pelt. Tom (deputy sub-captain, cabin boy) has been down there with Ian (Chief engineer) pretty much everyday and the hard graft and hours is really starting to show. We have all the panelling done and painted, the kitchen has gone in and the first fix of the wiring has been started on. Who’d a thought we’d start thinking about kitchen appliances?

The only downside about going into this in more detail is that Ido most of my comms with the boat over FaceTime so there actually aren’t that many photos… yet. We will be doing a bit photo session next time I’m down next week but in the meantime there are only a couple of pics of the panelling.

Most of the fit out is quite plain at this stage but we do have these plinths covering the larger ribs. They look unintentionallyquite Art Deco which does fit in with the age of the boat. From fireboat to 1920s gin palace πŸ˜ŠπŸ‘πŸΌ

Ballistic black

Final bits of paintwork before it is back in the water. Betty has basically been dipped in jotamastic 87 and there isn’t hardly an inch that hasn’t had at least one coat of the stuff. Below the waterline, we are topping this off with a couple of coats of ballastic black, a more traditional style blacking that has some bitumen in it and is less prone to showing any minor dinks (of which there will be none of course!).

Half way through putting two coats on and she’s looking a mean ass boat. A stealth torpendo, black bottomed Betty.

A shout out here to SML paints who I have called endlessly over the four years. They have been faultlessly patient and responded to all my questions about what I can layer on what, antifoul, different thinners for two pack paint… you can imagine how painful this must have been for them at times but they were never not charming.

This one’s for you Ben

When I took on beta iii, it didn’t look quite how it did when it was first built.

We took the weird structure off the top and reinstated half the deck which had been lowered when she was a tour boat. The final cherry on the top was to put the square windows back, three on either side. Now I have searched for LITERALLY four years to find some square portholes or other windows the right size. Either too big or too small – nothing in the uk, Europe, India or the US. So Ian made them, and now they are in and she is her original silhouette back.

The back cabin, which will be the galley is totally transformed. It looks so smart and she now looks just like she did when she was pootling up and down the Thames nearly 100 years ago!

(The post is for Ben of Liquid Highway who has been sending me a steady stream of pictures of beta iii over the years. He seems to be able to identify her whatever the angle or the quality of the photo, I think in part due to the square windows)

Square portholes

So many different loose ends being tied up as this project – hopefully – draws to an end. One of these is the square portholes. These were an original feature, quite distinctive in the historical photos, that had been removed at some point – likely when the Front deck was dropped – and replaced with circular Ines. Given we were three circular portholes short on each side when we re-raised the deck, it made sense to reinstate the square portholes.

The only problem is that you can’t find square portholes of that dimension for love nor money anywhere. Literally anywhere – not on Ebay, not at salvage yards, not in India where all the more recently salvaged boat fittings come front. Not anywhere. And I’ve been searching for four years.

Good thing that Ian can knock up a wooden version. These look great and are exactly the right dimensions so fit just where we want them. Photos of them in place next week!

Foam party

They came, they saw, they sprayed. We had debated sheet insulation but it doesn’t give full insulation coverage. We also pondered doing it ourselves but the raw materials (whatever the magic juice that creates the foam is) is pretty spenny and there is a high risk that you would get the settings wrong and jizz half of it on the floor by accident before having insulted anything. So a couple of nice chaps came from margate to do the job. And now it’s all ready for the panelling to go on. Magic.

This week’s update

Striker Rail on. Welders have welded up that little (but potentially catastrophic) hole in the bottom and cut the windows. Ian has made the new windows. And we are pretty much ready for the spray foam man on Thursday.

The photo above shows the effect all this hard work is having on Tom – stressed, grubby, but with a great suntan.

Wrestling with conger eels

Next on the never ending job list is fixing the rubbing strakes to the boat. Betty had two rows of these, wood in some places and rubber in others. This had pretty much perished and was removed. The new stuff wasn't cheap to buy (hell, what with this boat is!), nor was it cheap to attach (as ever, why stick one bolt on when a gazillion would do – this stuff ain't coming off!).

The job of attaching it has been a bit of a ball ache for tom and Ian. These pieces are about three metres long, they weigh as heavy as they look. To attach…. take a d shape rubbing strake, a plastic washer insert, bolts a plenty. Beta Iii is littered with 13mm holes in a pre-defined channel. We got over 200 m12 bolts (horrendous cost). The nut goes on the inside, so we drilled through a 5mm pilot from the inside out, then a 13mm bore hole from outside in. You really need a diagram here… then the washer strip is slid in and the whole lot bolted on. This is all done working at height – you have to get the rubbing strake about two meters off the ground and do a lot of running in and out of the boat and up and down ladders to fix everything in place. Fun times.

The job has triple negative characteristics of being fiddly, requiring precision, and involving incredibly heavy objects. Bit of an arse really. Fortunately the result is very pleasing. I can only describe it as having the framing effect of like giving the boat eyebrows. Really expensive, heavy, time consuming eyebrows.

Also big thanks to the chap at Wilkes (I have completely forgotten his name but it will come to me). He was super super helpful throughout the purchasing and fitting and turns out is one of the skippers of the Massey shaw so really knows his onions.